IMG_8802

Tea and biscuits is one of the best things about being British.  It can heal broken hearts and temper break downs.  It can pick you up and relax you.  So when I got approached to review these biscuit cutters from Dexam, it was an instant yes.

IMG_8805

The cutters encompass four of the most popular and recognisable British biscuits: the custard cream, the bourbon, the jam treat, and the party ring. The party ring and jam treat have separate hole cutters which can handily be stored on the main cutter itself so they don’t get misplaced.  Best thing about DIY-ing your own classics is that not only do you get a punch of nostalgia, you can change up the biscuit dough and fillings with your own flavour combos. I’m definitely going to revisit these.

 IMG_8809

I was surprised at how well the custard cream cutter stamped a good indent into the face of the biscuit. If you keep the cutter clean between uses then they are really easy to use.  If you don’t, then you end up with this:

IMG_8806

The only strange thing I found about the cutters were the fact that the cutting edge sloped inwards slightly so you don’t get a very clean cut around the outside of the biscuit.

The jam biscuits and party rings also came out well. Slap in a bit of filling or some glace icing and you’ve got a plateful of really sweet looking treats.

IMG_8832

IMG_8833

The cutters are available from Fenwicks now or online (by clicking here), retailing at £10.99.

IMG_8839

I received these cutters free of charge to review. I haven’t been paid to write this review and all opinions are my own. 

IMG_8751

Christmas in July is one of life’s small pleasures.  Mainly because when people say “Up to anything after work, Hannah?”, I can just say “Yeah, going to a Christmas thing” then just walk away after revelling in the gloriously confused look on their face for a split second. Thank you Dotcomgiftshop, for providing this.

IMG_8773

IMG_8772

IMG_8766

They have some pretty new ranges this year.

IMG_8742

IMG_8753

The bird print items were seriously on point…

IMG_8754

… As were anything garden related.

IMG_8745

I obviously need this for work.

IMG_8770

Sassy Octopus was one of my favourites.

IMG_8779

IMG_8790

IMG_8777

Beautiful things for small people.

IMG_8783

IMG_8786

IMG_8781

IMG_8789

#ceramicporn

IMG_8759

IMG_8762

Thanks to Dotcomgiftshop for the invite.

 Parma Violet Meringues

I bribe myself.  Need to do a mundane household task like cleaning the top of the kitchen cupboards or washing the net curtains? I’m going bribe myself into it with agreeing to buy that book I’ve been meaning to tick off my list.  Need to write an assignment? Totally going to reward myself with a Netflix binge watch.

Parma Violet Meringues

I bribed myself into cleaning the oven with chocolate.  I bribed myself into tying in the climbing plants in the garden and weeding with a manicure.  I bribed myself into packing away my winter clothes with eating almost all of the leftover christmas sweets.  Almost all of the leftover christmas sweets…

IMG_8616

Parma Violet Meringues: Crisp, coloured meringues flavoured with the gentle, floral sweetness of a British childhood classic, Parma Violets.

Ingredients

2 egg whites
1/2 tsp white wine vinegar
80gr caster sugar
20gr Parma Violet sweets, crushed into a fine powder
Purple food colouring paste/gel

IMG_8619

Method

1, Beat the egg whites until they are foamy and add in the vinegar.
2, Carry on beating the egg whites until they reach soft peaks.
3, Turn the speed up and slowly start adding in the caster sugar (EDIT: and the crushed parma violets).
4, Carry on beating the mixture until you can rub a tiny bit between your fingers and it doesn’t feel grainy and you’ve reached a thick glossy mixture that holds its shape when you lift the whisk.
5, Preheat your oven to 100 degrees C and line a baking sheet with baking paper.

IMG_8624
6, Fit a disposable piping bag with a round nozzle. Dip a skewer in the purple food colour paste/gel and drag it up the sides of the piping bag, creating three or four stripes.  Decant the meringue mix into a piping bag and pipe onto the baking sheet, holding the bag vertical to the sheet with a 1cm gap, squeeze and pull up into a point.
7, Bake for one hour (if they’re small) or one and half to two hours if they are large. Then turn off the oven and leave until completely cold.
8, Store in an airtight container for up to two weeks.

IMG_8628

IMG_8602
The other week, I forgot my headphones on the train and had the pleasure of listening to a woman talk about her search for the perfect pair of shoes for a dress she had bought. For 25 minutes.  Now, don’t get me wrong, I like a good shoe.  Dresses are my jam. But, I struggled with the effort this woman went to to find these shoes and the fact that she took 25 minutes to relay this to the person on the other end of the phone.
IMG_8569
She searched high and low. She went into vintage shoe shops.  She hit the high street.  She scoured the internet. She suffered from all extremes of, what I call, The Goldilocks Complex.  Some were too high or too short.  They were too shiny or not shiny enough.   She went to lengths that I neither had the time or patience for.
IMG_8584
Which made me think, have I ever put that much effort into searching for something? And I came to the conclusion that I hadn’t.
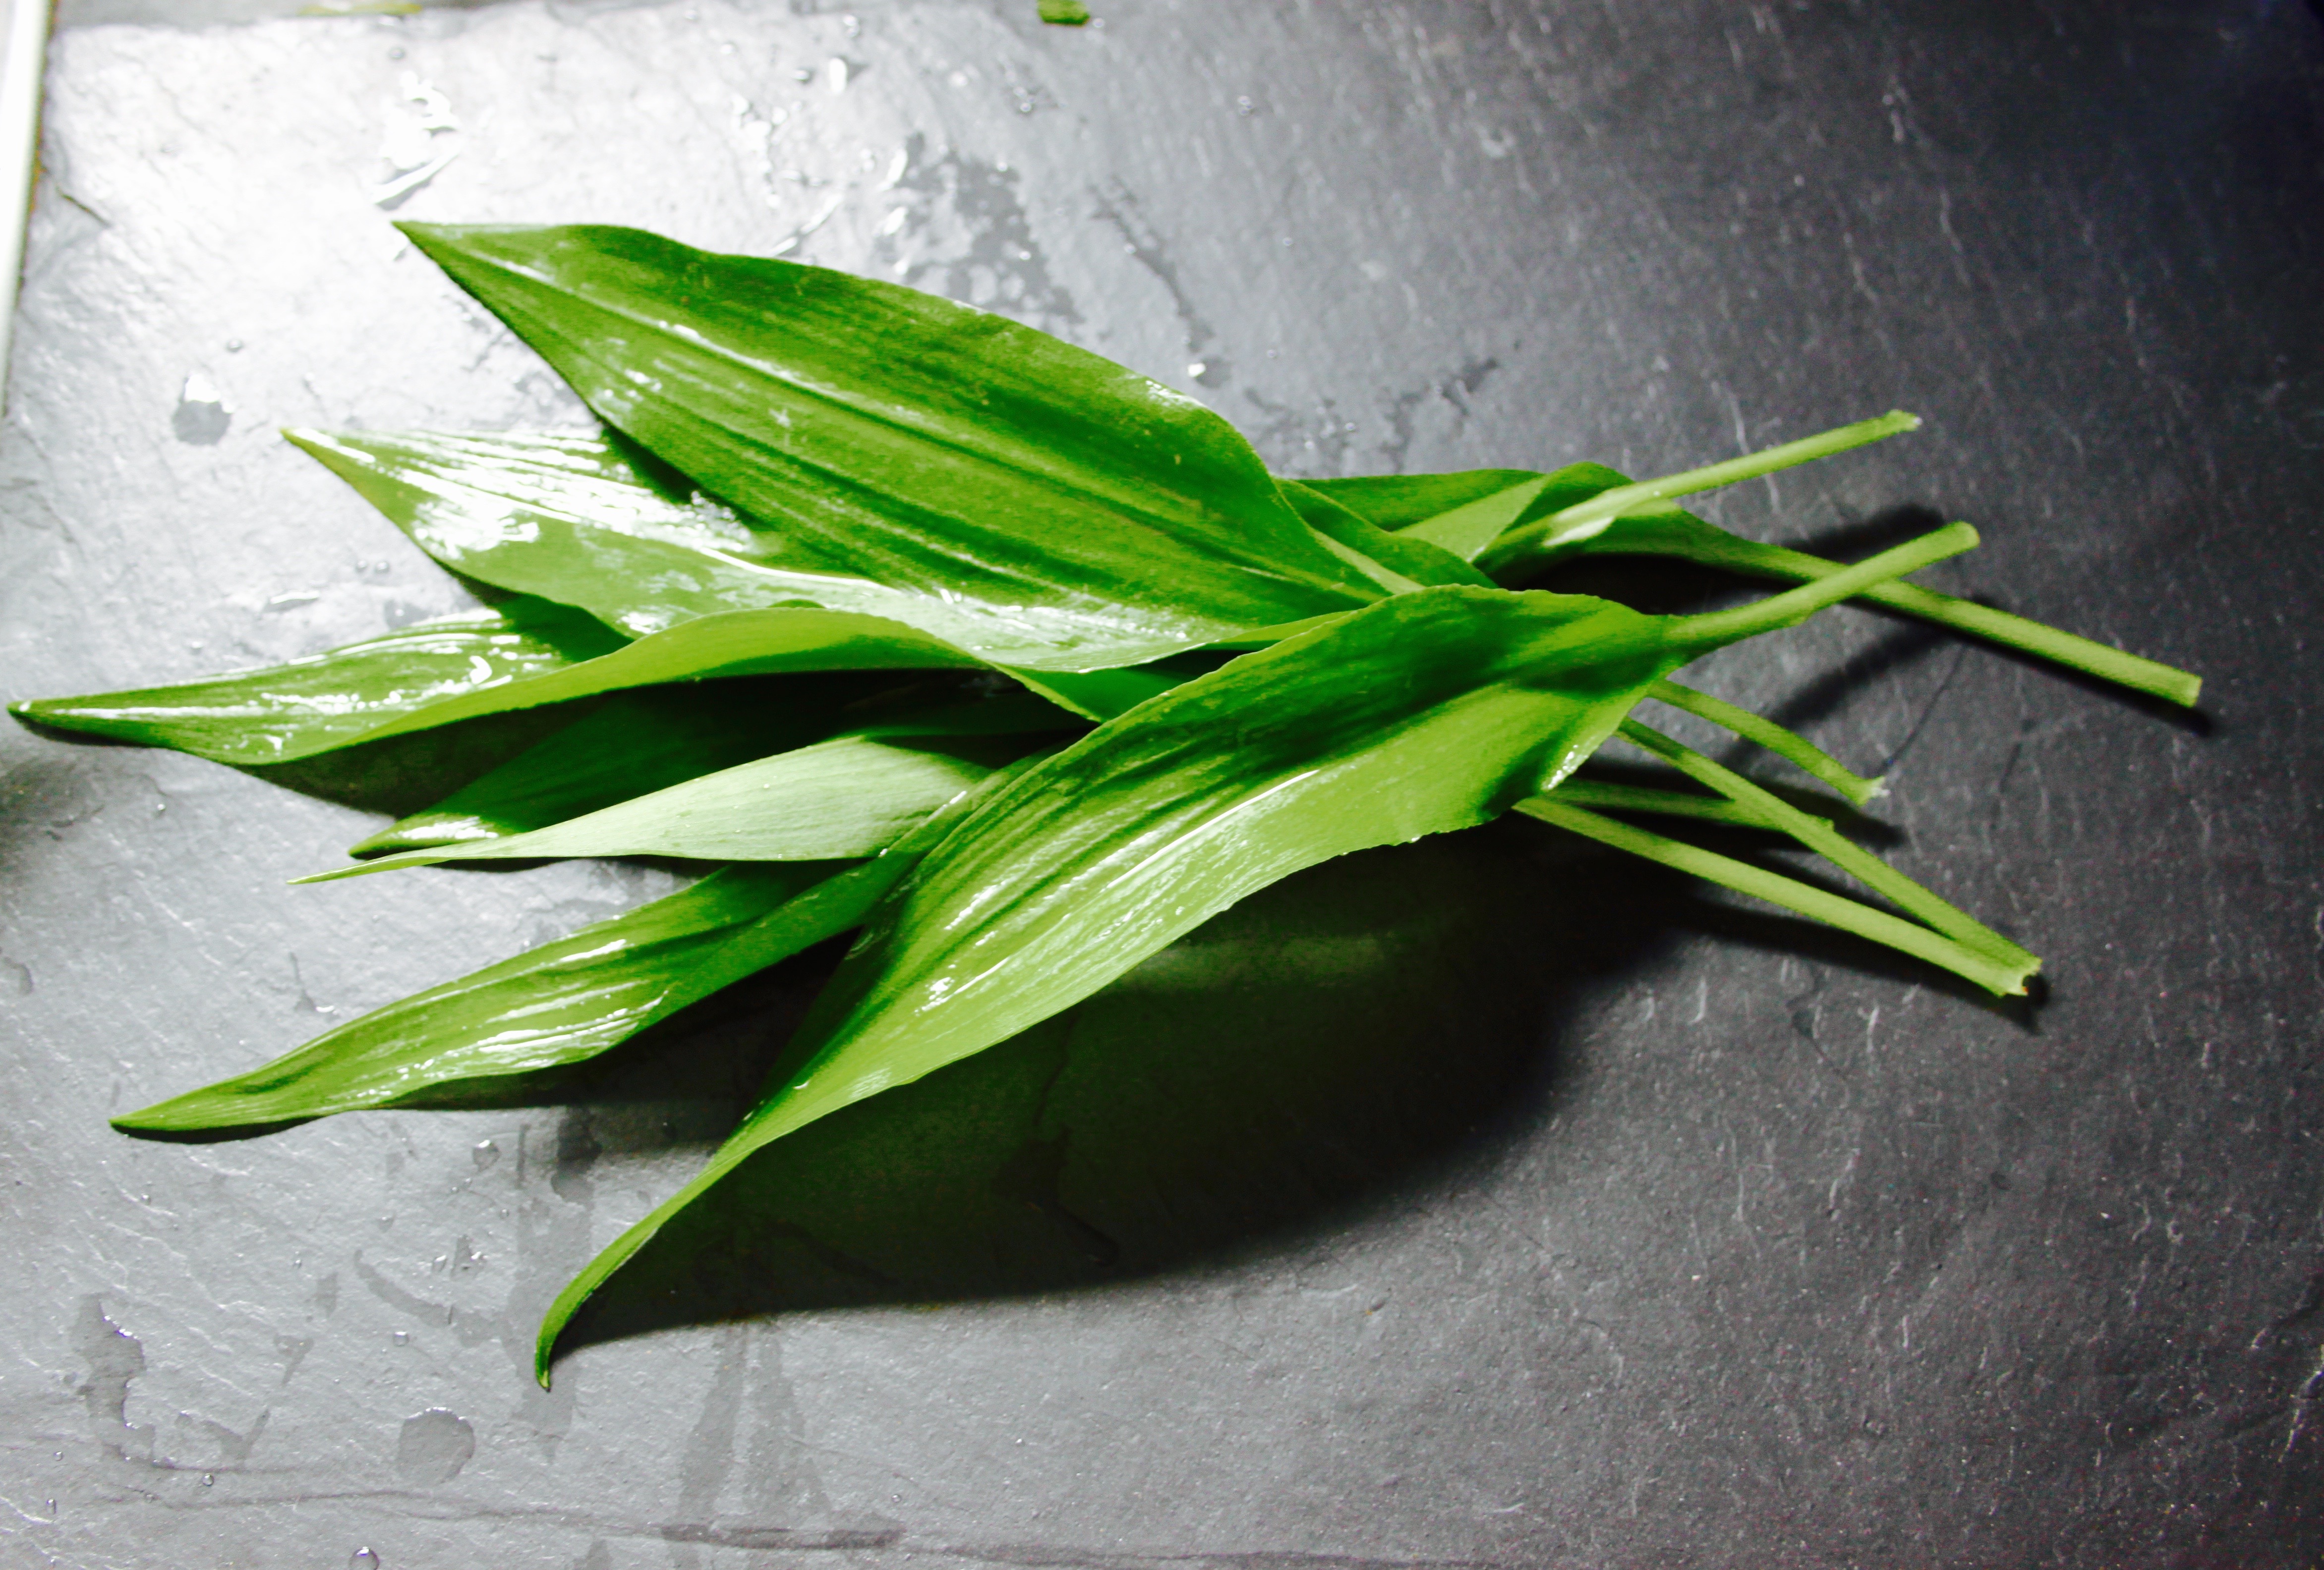
Until Mr Honey & Dough and I went hiking and we came across a bank of wild garlic. I then proceeded to explain to him the lengths I have gone to to find wild garlic near our house.  That conversation lasted for well over 25minutes.  Oops.

IMG_8596

(Recipe based on this one)

Ingredients

225gr plain flour (plus a little extra for rolling)
Large pinch of table salt
Large pinch of caster sugar
Small pinch of ground black pepper
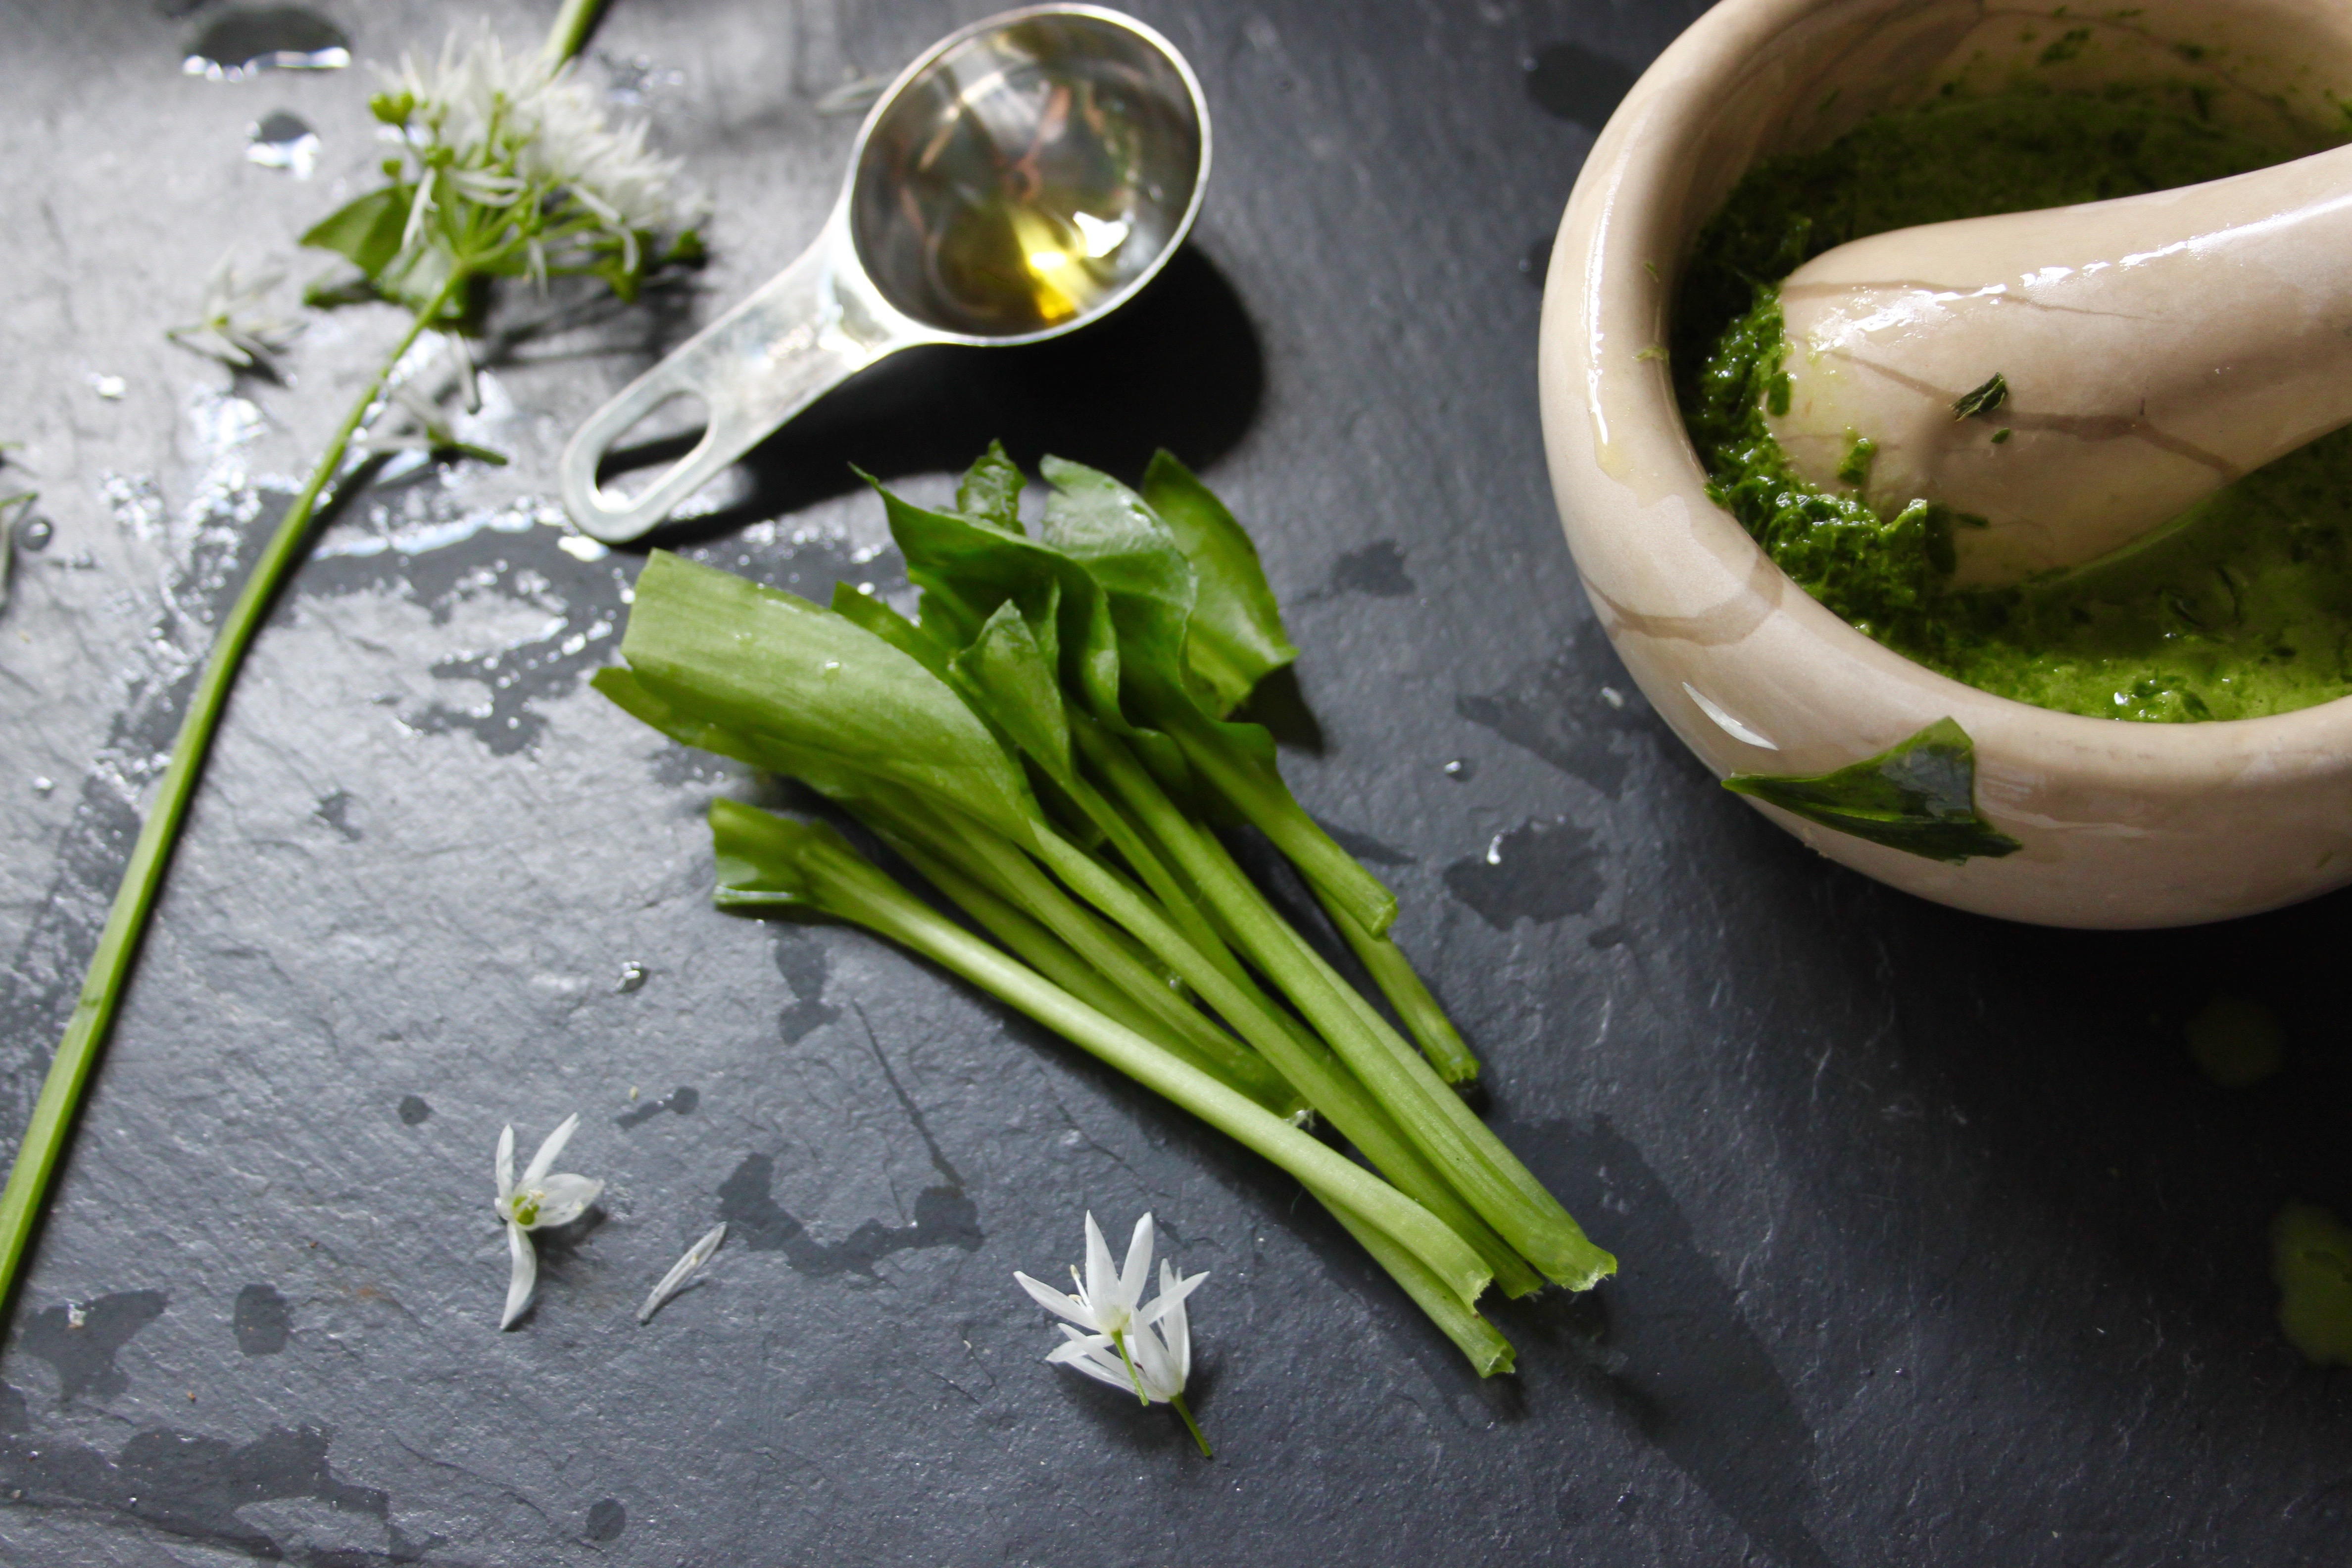
15 wild garlic leaves, washed and patted dry (around 50gr)
3tbsp melted butter
125ml water

IMG_8580

Method

1, In a large bowl, sift the flour with the salt and sugar.
2, Rip the wild garlic leaves into pieces and grind them in a mortar and pestle with the melted butter until you have a thick paste.  Alternatively, you can stick them in a blender with half of the water and pulse until you have a bright green paste.
3, Pour the wild garlic paste into the bowl with half the water (if you didn’t use it before) and stir well.  Gradually add in the remaining water and keep on bringing the dough together until it comes into a green ball of dough. You might not need all of the water, or you may need a little bit more. I made a batch of these in my stand mixer and the dough came together really quickly if you’re feeling lazy.
4, Preheat your oven to 220o/c and line two baking sheets with greaseproof paper.
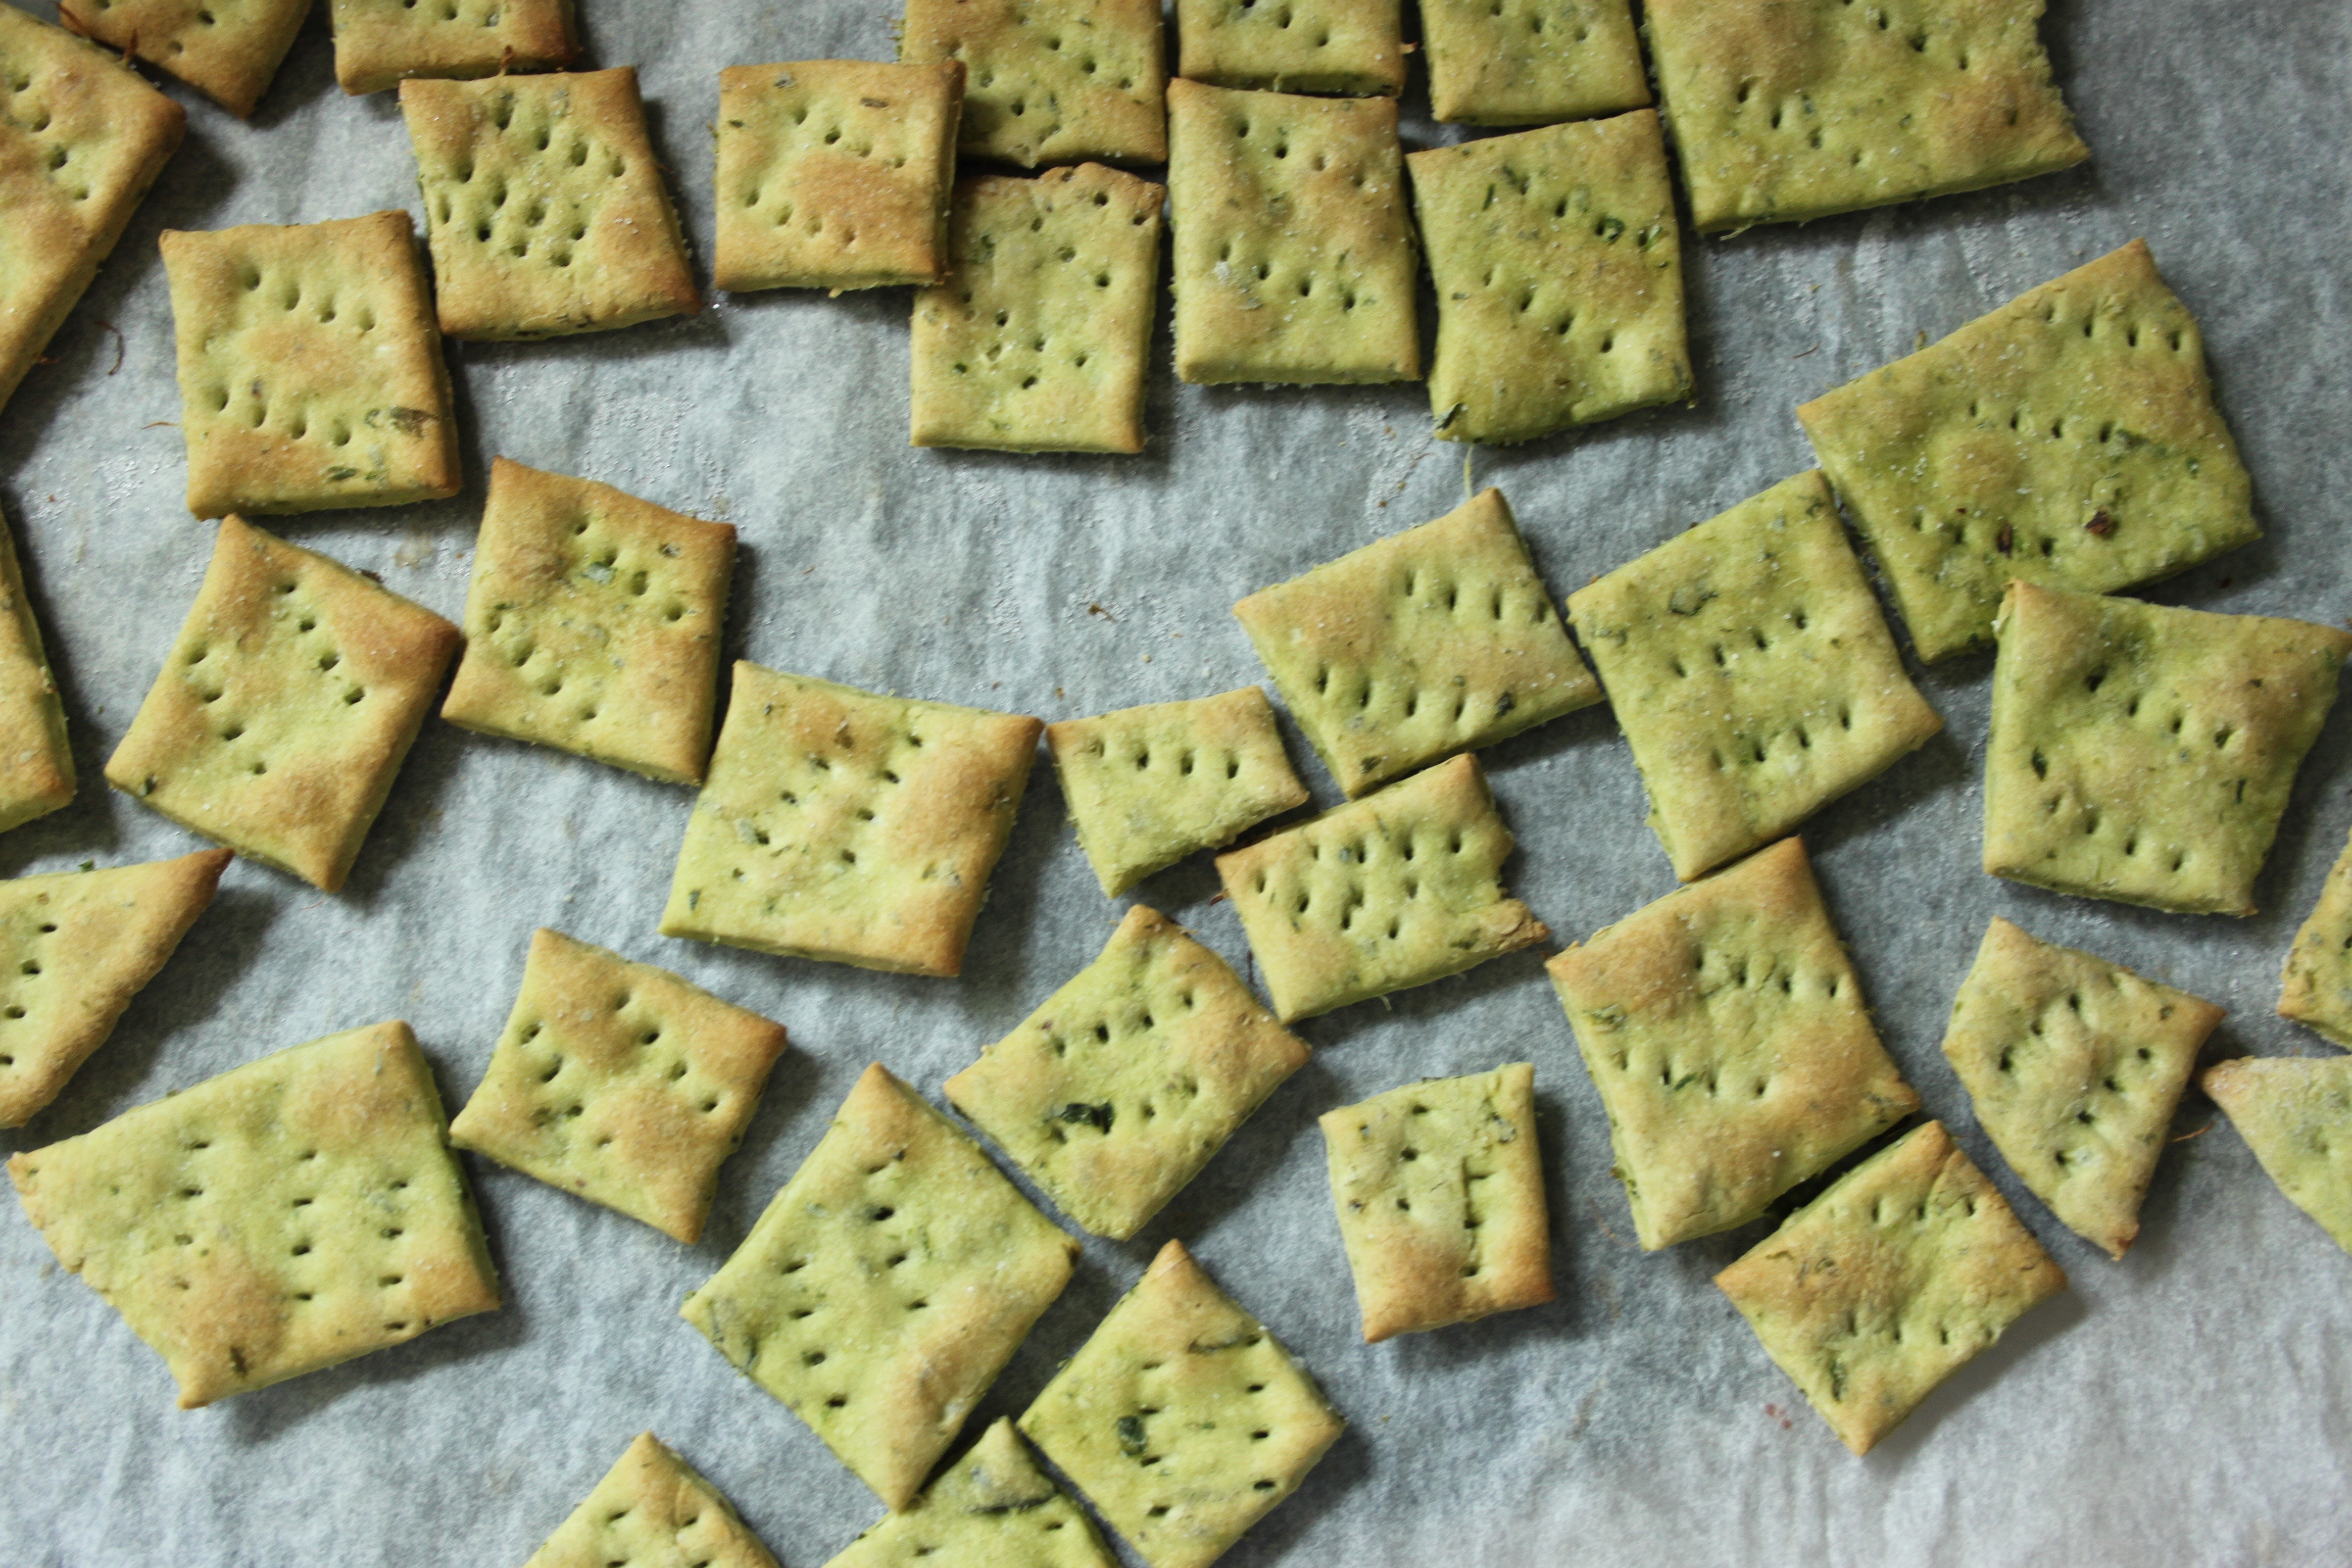
5, Dust your worktop with a little flour and divide the dough in half.  Roll the dough out with a rolling pin until it is 5-3mm thin. Cut into pieces.  You can either measure and cut or just go ham with a pizza cutter (a la moi).

IMG_8591
6, Pop the crackers on the lined baking sheets and prod each one with a fork a couple of times so they don’t puff up.  You can sprinkle them with a little more salt here if you fancy.
7, Bake for 10-12minutes or until they are just going golden.

IMG_8605