
This was one of my favourite recipes from my old blog. #cheekyreposttime #exclaimationmarks

Ingredients
Chocolate Shell
200gr milk chocolate
Marshmallow Filling
12gr powdered gelatine
60ml cold water
80ml golden syrup
220gr caster sugar
1tsp vanilla extract
Water

Topping
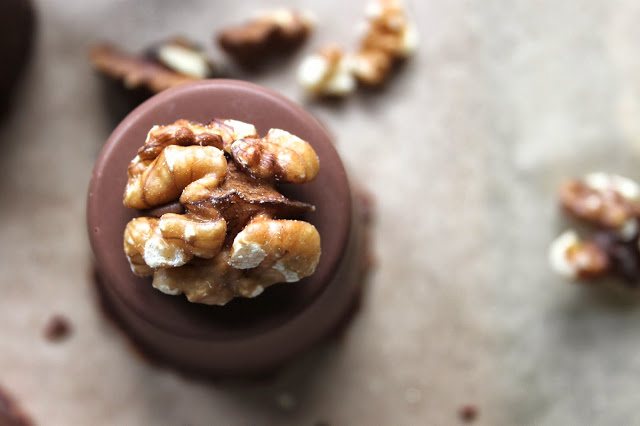
4 walnut halves (or more, these are big)
You will also need four silicone dariole moulds. Mine were roughly 9cm high.
Method
1, Melt the chocolate and paint the inside of your dariole moulds with a layer of chocolate. Leave these in the fridge to cool before painting with another layer. Return these to the fridge until you are ready to fill them. You won’t use all the chocolate up yet, we need some left over to cover the bases.

2, Make the marshmallow filling by putting the gelatine and cold water in the bowl of your stand mixer. Stick on the whisk attachment so you are ready to go when your hot sugar syrup is ready.
3, In a medium sized saucepan add in the golden syrup, caster sugar and a good couple of splashes of water to cover it. Set over a medium high heat and stir until the sugar has dissolved. When it has all dissolved, stop stirring and use a damp pastry brush to remove any rogue sugar crystals from around your pan. If these fall in, they could trigger crystalisation and that would be a bummer.
4, You want to boil the sugar syrup until it reaches 140o/c on a sugar thermometer. When it has, remove immediately from the heat, set your stand mixer to a medium speed and with it running, pour a slow trickle of the hot syrup directly into the bowl. Try not to hit the spinning whisk attachment. Or you end us with a whisk attachment that looks like this and hard sugar crusted over everything you love. (inside of your stand mixer bowl).

5, Keep the stand mixer running until your marshmallow turns white and has the consistency of really sticky bubble gum. This can take around five minutes but keep an eye on it.
6, Wrestle the marshmallow into a pipping bag. You don’t need to both with a piping tip.
7, Remove your moulds from the fridge and fill each of them almost to the very top with the marshmallow. It should level itself out slowly. (Optional -Squeeze the rest of the marshmallow into your mouth.)
8, Using some of the left over chocolate, cover the top (which will be the bottom) so that no marshmallow is peeking through. Again, keep a bit of the chocolate for sticking on the walnut halves. Stick these back in the fridge for at least an hour.
9, Unmould the whips from the silicone moulds. Using the very last of the chocolate, use it as glue for sticking on the walnut halves. Stand back and admire your handiwork. Eat these within a day. It’s not hard.

I love this post! I am sitting here with my chocolate bar reading and loving this post! I will defiantly try this out.
https://roopjohal.wordpress.com
Yum! These look delicious!
Ooft! YUM! Glad you reposted that one.